When you have a website that requires guest and visitor submissions, you will need to install a plugin to your wordPress Website. Here, we will show a free-to-use and very flexible plugin that you can use to allow user submitted Posts on your WordPress Frontend.
The plugin we will use can be used for all types of submissions, from pots, products, listings, forms that can be shown publicly, reviews, feedback and more custom submissions. You can also allow guest posting or require registration when submitting the posts.
Video: Guide on Allowing user submitted posts.
Step-by-step guide on allowing users to submit posts on WordPress Frontend
Below are the steps you need to follow to enable this feature on wordpress.
1. Install the WP User Frontend
We will use the free version of the WP User Frontend Plugin.
Install the plugin by going to your WordPress dashboard then navigate to Plugins, Add New. Search for the Wp user frontend, install and activate.

Skip the welcome Wizard by clicking on not right now and proceed with the steps below.
2. Create a post submission form
To allow users to add posts, you will have to provide the with a form, the first step hence will be to create the posting form.
To create a form, go to User frontend, choose post forms then click on Add form.
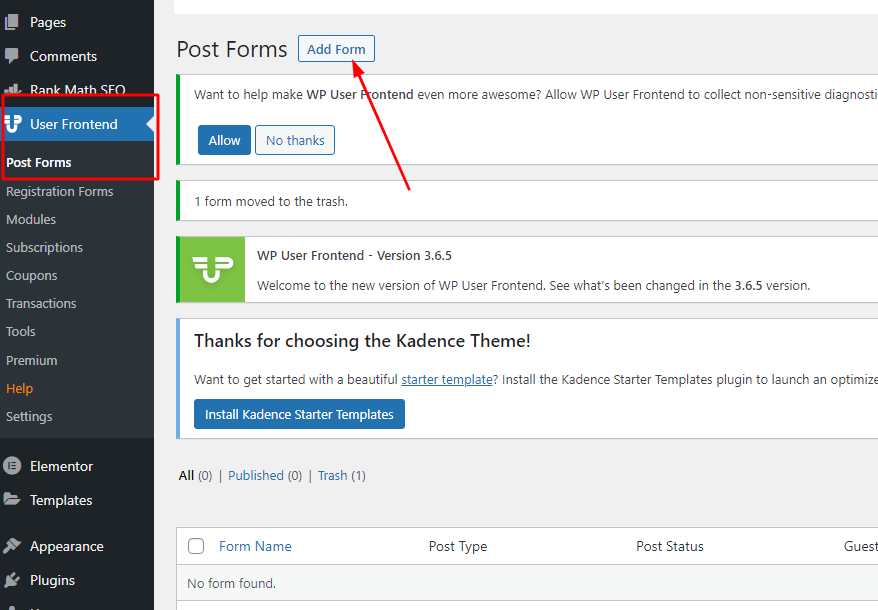
You can choose different templates, from an empty form, post form, product form, blank form and more.
We will begin with a blank form and Create a post submission where users can submit a car listing to our website.
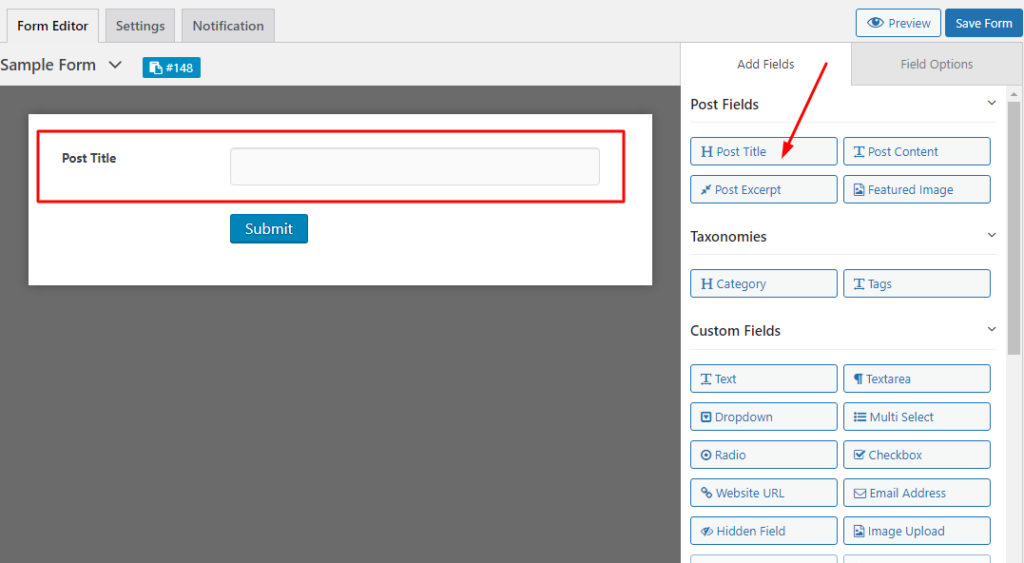
3. Adding fields to your post form
Below we will show you how to add custom fields to your WordPress post forms. Since we are going to add a car listing post form, we will add the following fields:
- Title
- Description
- Category
- Images
- Contact
- Model year
Note: Every Post form must have the Title field as required by WordPress.
- Let’s add the Title field to our form by clicking on Post Title in the Add field options.
To customize the Title, hover on the field you added and click on the edit icon, on the right of your screen you can change the field label and set it as required.

2. Let’s add the description field by clicking Add Fields, then Post content and customize it.

3. Now, we will add the category field by clicking on Category in the Add Fields option. Categories that are related to the post type we will choose later will be shown to users automatically.

4. For the images field, we will first a main product image, by clicking on Featured image on the Add fields option.

To add the product Garelly/more images field, click on the Image Upload field.

4. For the contact field, we will use the Text option and change the label to Phone number.

5. For the model year, we will use the Dropdown field to allow users to select the model year of the car.

Above are just some of the fields you can add to your post form, there more field options such as Radio, Textarea, Checkbox, Multiselect, etc.
Also see, How to get your posts indexed by Google in hours.
4. How to customize Post form fields
Every field on your post form can be customized to fit your intended user case. By hovering on any field on the posting form, you are presented with the following options:
- Drag- this can be used to move the position of any field on the post from
- Edit- clicking on the icon will open the edit screen for the particular field
- Copy- if you want to duplicate a field, use this icon
- Delete- removing fields is very easy, just click on the delete icon and confirm the deletion
The edit option will give you a lot of customization capabilities for your fields, below is a look at some of them. Click on advanced options to fully customize your field.
- You can change the Field label
- The meta Key for the field can be accessed from here and even modified
- Set the field as optional or requred
- Enter a help text to give instructions to users on what the field is about
- The placeholder can be used to enter a value that will serve as an example to the users
- Default text will be saved if the user does not enter anything
- You can also set the minimum or maximum characters/words
- For image upload, you can change the number of images and maximum size
- If you do not want the field data to be shown in the post, disable it on advanced options
- One can also hide a field from all users or some users
- Field labels can also be disabled

5. Post Form settings
After you have added all the needed fields for your post form, the next step is to configure the general settings for the form. Do this by clicking on settings.

Here is an overview of all the available settings.
- The first option is post settings, here you can do the following:
- Choose the post type, Note: The category options will change automatically with respect to the post type you pick.
- Pick whether the post will be published, draft or pending review after submission.
- Choose the default category if the users doesn’t picky any
- Enter the page the user goes to after submission and the message they will see
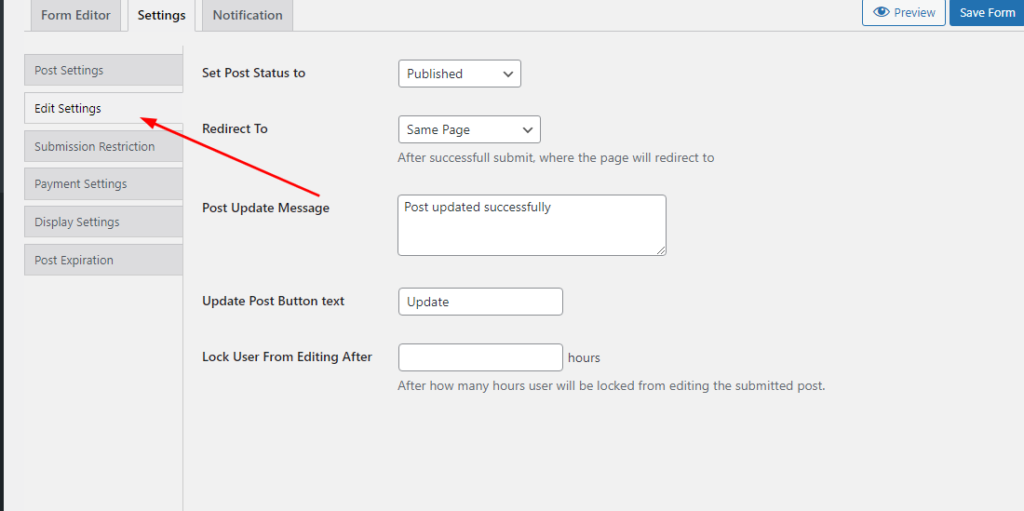
2. On the edit settings, you will configure how the user edits posts that they submitted previously.
3. On the submission restriction option, you can enable Guest posting(users who are not registered) or even require registration when submitting posts by enabling Name and Email address.

4. The payment options can be used if you want to charge users who are adding products or posts to your website.

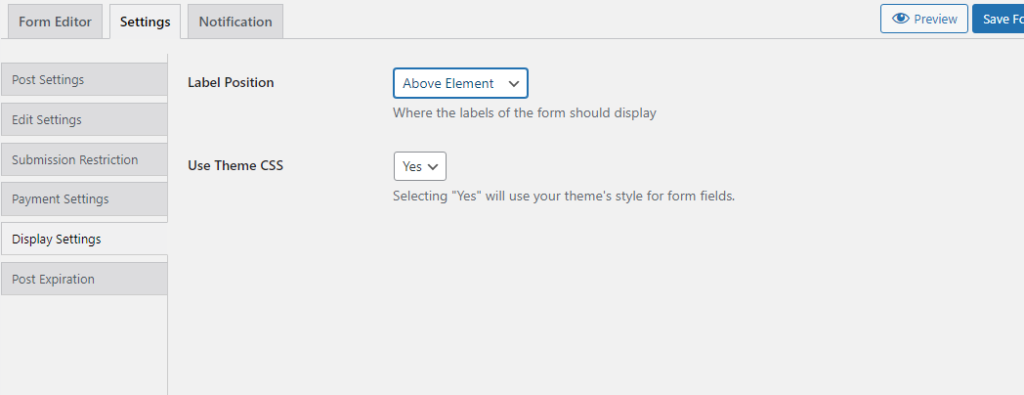
5. If you to change the position of Field Labels on the post form, use the display settings option.
The last option will be to enable or disable notification when there is a new post. When done click on save form and continue with the steps below.

6. Enable custom fields display in posts
Now that you have your form ready, you will need to enable custom fields visibility when a post is added. To enable, go to User frontend then Settings. Choose frontend posting and make sure that Custom Fields in post is switched then save your changes.
 7. Display post form to users
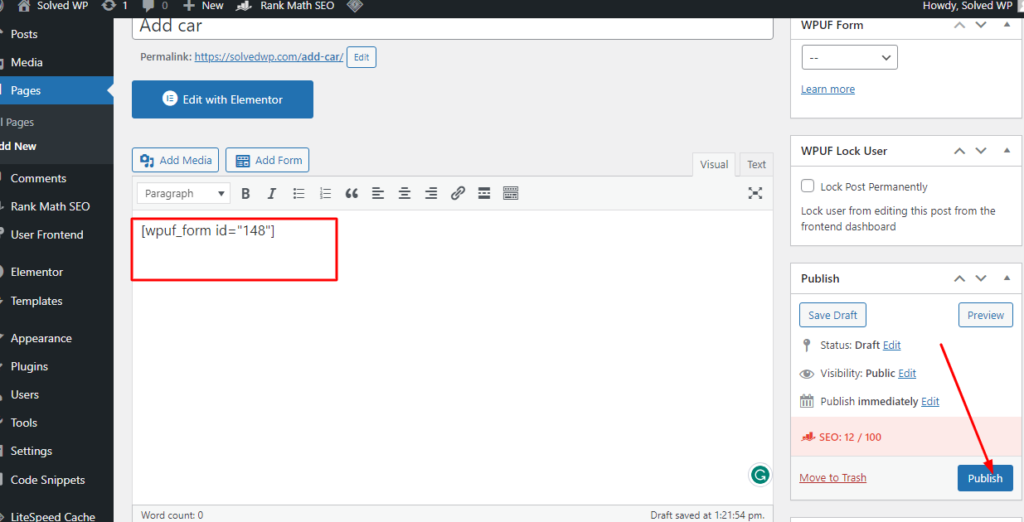
Our post form is now ready but still, users can not see it. To display the posting form to users, use the shortcode provided by WpUser Frontend.
Just go to User Fronted, post forms and copy the shortcode of the post form you created. You can insert this shortcode anywhere on your pages and posts and it will be visible to users.

We will create a new page and paste the shortcode on the page.
8. Post submission in Frontend
Now you can place the link to the page you created on your menu or even add a button on your site header area. When users visit the page, they will be able to fill in the form and submit their posts.

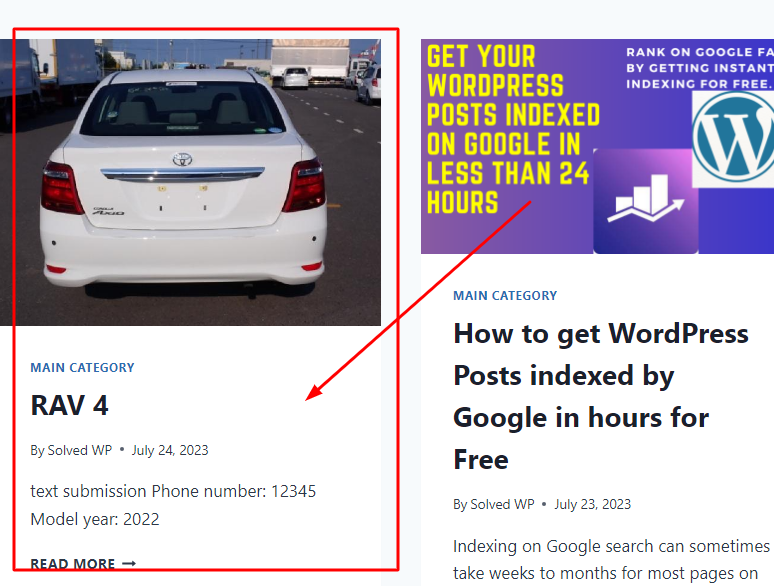
Below is a post submitted on the WordPress frontend using the form we created. Test your form also to make sure everything is working fine.
Conclusion
As you can see from above, WP User Frontend is the best plugin for anyone looking for a flexible yet simple way to allow user submissions from frontend of their WordPress websites.